 |
How to Draw A Yin Yang Using Adobe Illustrator CS |
|
| Create a new document, 6" x 6". Under Window, open the Transform and Color windows. |
||
 |
Using the Color Window, set the edge and fill colors to black. Under the Rectangle Tool, choose the Ellipse Tool. Create an ellipse, 5.5"x5.5". Using the Transform Window, place the center of the ellipse at 3"x, 3"y. |
|
 |
Using the Color Window, set the fill to none (red diagonal line) and the edge to bright blue or some other bright color. Create an ellipse, 5"x5". Using the Direct Selection Tool, choose the upper left quarter of the ellipse and delete it. Repeat with the lower left quarter of the ellipse. This will give you a half-circle shape. |
|
 |
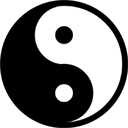
Using the Color Window, set the edge and fill colors of the half circle to white. Using the Transform Window, place the center of the ellipse at 3"x, 3"y. Half of the Yin-Yang is black and half white.Next step is to make the lobes protruding into the other color. |
|
 |
Create another white ellipse, 2.5"x.5". Set the center of the ellipse at 3"x, 4.25"y. This forms the upper lobe of the Yin-Yang. | |
 |
Set the edge and fill colors to black. Create another ellipse, 2.5"x2.5". Set the center of the ellipse at 3"x, 1.75"y. This forms the lower lobe of the Yin-Yang. | |
 |
Create
another black ellipse, 0.75"x0.75". Set the center at 3"x, 4.25"y. This
forms the center of the white lobe of the Yin-Yang. Create a white ellipse, 0.75"x0.75". Set the center at 3"x, 1.75"y. This forms the center of the black lobe of the Yin-Yang. |
|
 |
You can make a variety of Yin-Yang designs using these directions. Here's some examples available from CafePress.com/fogweaver on apparel and other merchandise. |